✅ Step-by-Step Installation Guide
1Create a Webhook in HelloSend
- Log in to HelloSend
- Navigate to Messaging → Automation → Webhook
- Click on the "Create Webhook" button

2Start a Drip Campaign with HelloSend
Easily automate your multi-step messaging journey using HelloSend’s Drip Campaign feature. This guide walks you through creating, scheduling, and managing your drip campaign — all integrated seamlessly into your CRM workflows.
✅ Fill in Webhook Details (Drip Campaign Setup)
- Friendly Name – A label to help identify your drip campaign easily
- From Number – Select the sender number for outbound messages
- To Number Fields – Choose a CRM module (e.g., Leads or Contacts) that contains phone number fields
- Phone Field – Select the specific phone field (e.g., Mobile or Phone) within that module
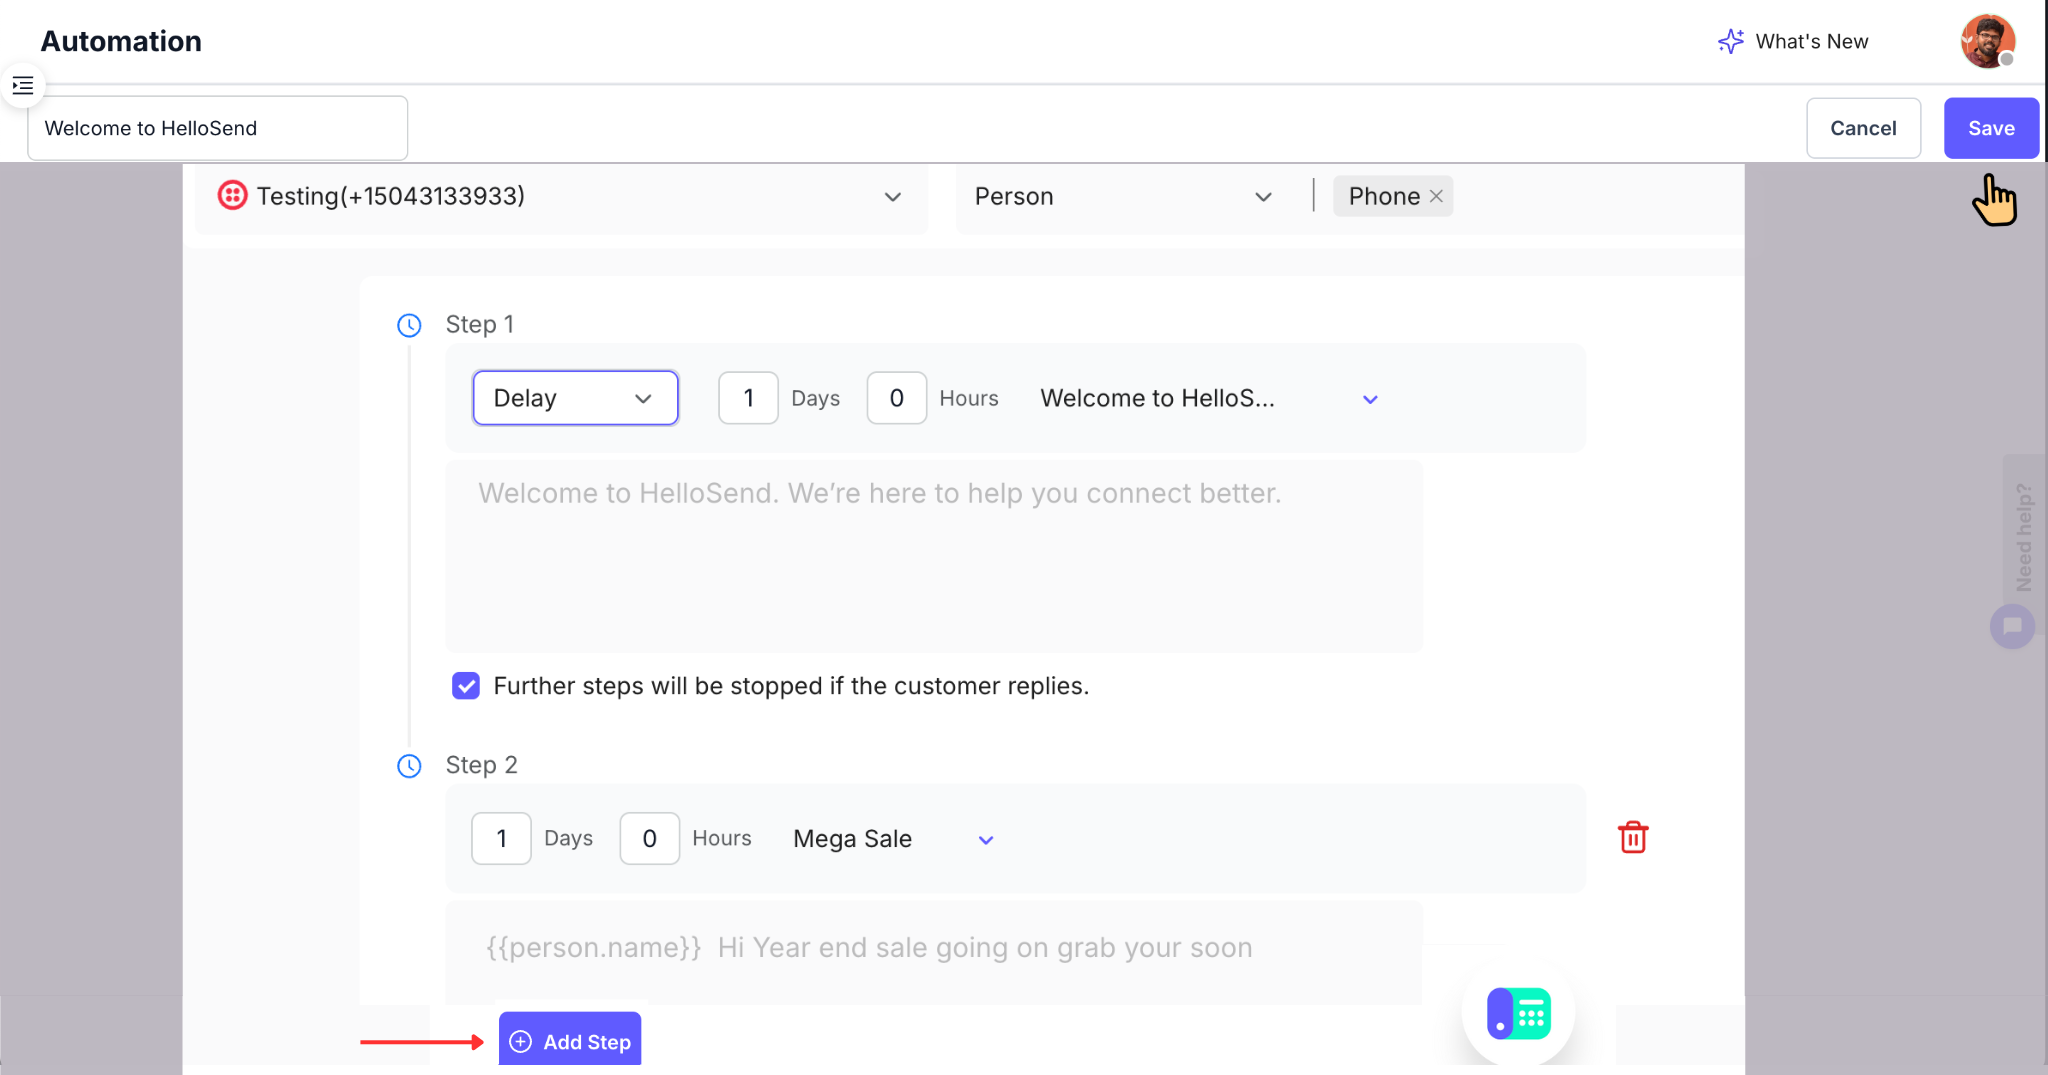
🔁 Configure Drip Campaign Steps
🟢 Initial Step (Step 1)
-
Send Type: Choose when the first message should be delivered:
- Immediate: Send the message instantly after the workflow is triggered
- Delay: Set a custom delay in hours or days before the message is delivered—ideal for scheduled follow-ups or reminders.
- Message Template: Select one of your pre-approved templates that defines the message content. This ensures compliance with provider guidelines and maintains consistency across drip campaigns.
- Reply Handling: Tick this checkbox if you want to stop the drip campaign automatically when the customer replies to any step. This prevents redundant follow-ups and respects active conversations.
🔵 Step 2 and Beyond
- After Step 1 is completed—based on its delay or instant send—the system automatically starts the countdown for the next step in sequence.
- For every new step, specify a new time delay and select a relevant message template. This helps you create a timed sequence of personalized messages.
- You can continue adding steps to build a multi-stage drip campaign tailored to customer engagement.
- By default, HelloSend supports up to 10 drip campaign steps. If your use case requires more, you can email assist@hellosend.com to request an extension.
- Click the "Add Step" button after configuring each stage to keep expanding your drip campaign flow.
💾 Finalize and Save
- Once you're done configuring all steps, review them to ensure timing, content, and logic are aligned.
- Click the Save button located at the top right of the interface. This commits your drip campaign setup and generates the webhook.
- Your new webhook will now appear in the Webhook Table, ready to be used for automation or integrated with CRM workflows.
📌Note: Once your drip campaign is completed, the generated URL will appear in the Automation Table. Copy this URL and use it while setting up your automation in Pipedrive to trigger the drip campaign as part of your automation.

3Set Up Automation in Pipedrive
- Open Pipedrive and click on the three-dot menu on the left sidebar
- Go to Automations, then click "Automation"
-
Create the Automation Workflow:
- Select a trigger event (e.g., when a deal stage changes)
- Add conditions as needed
- Click "+" to add an action
- Choose "Webhook" as the action type

-
Connect HelloSend Webhook:
- In the top right, click Automate Webhook ” to create a webhook action.
- Copy the desired Webhook URL from HelloSend
- Paste the URL into the "Endpoint URL" field in Pipedrive
- Use the same Friendly Name as in HelloSend
- Click Save

-
Define Webhook Request:
- Choose Method: POST
- In the key-value pair, enter: id → Deal ID
- Click "Apply Action"
- Set the automation toggle to Active

4Automation Trigger Example
When a deal stage changes in Pipedrive, the webhook will automatically trigger, sending a message using the selected HelloSend template to the person associated with that deal.
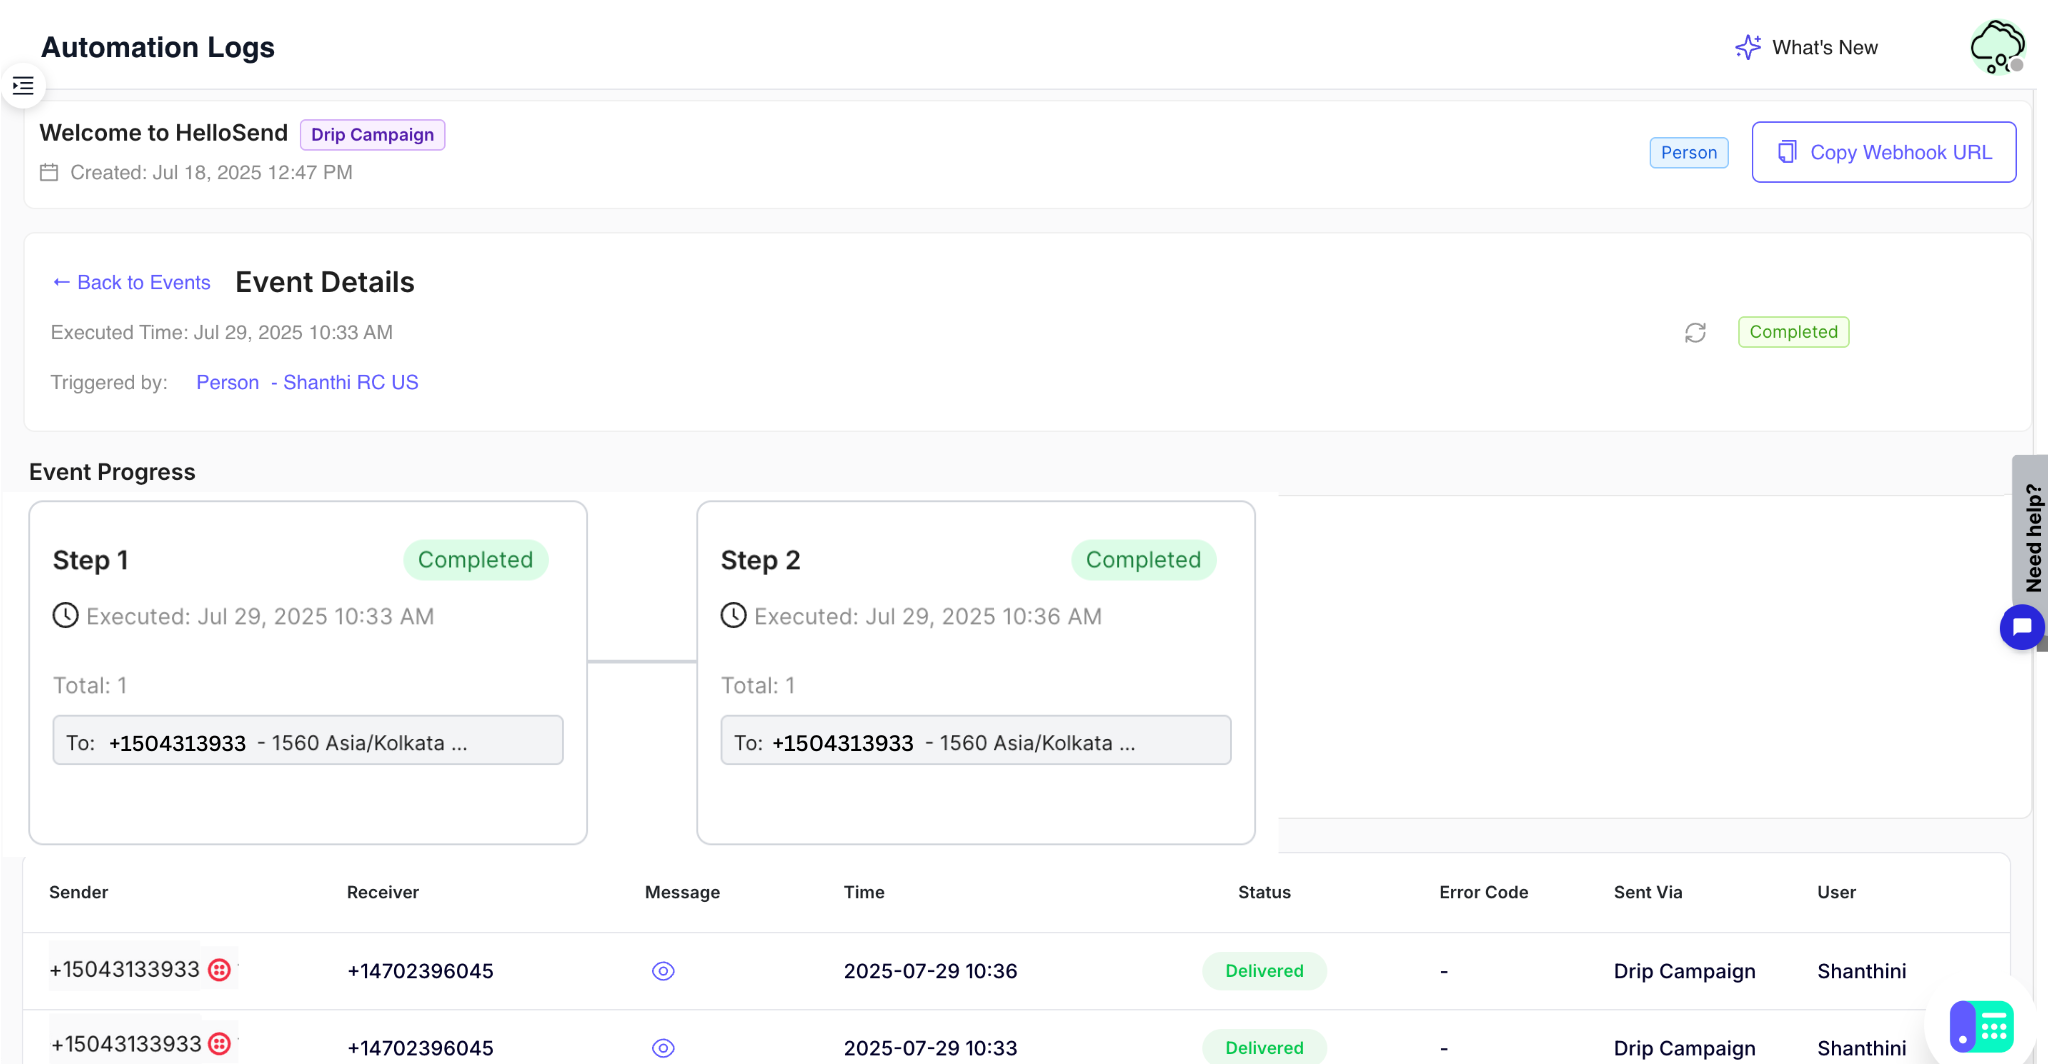
5View Automation Logs in HelloSend
Once you've completed setting up both the HelloSend Drip Campaign and your Pipedrive automation workflow, and the automation is active, you can begin tracking its execution directly from HelloSend.
✅ How to Access Automation Logs
To view detailed execution logs:
- Navigate to Messaging → Automation → Webhook from the sidebar in the HelloSend app.
- Click the "View", link under the "Logs" column next to your automation.
- Then, click on the "Automation Name" to open the detailed execution view.
📘 What You'll See in Drip Campaign Events
The Drip Campaign Events section provides a breakdown of each triggered event, allowing you to:
- View logs of all automation activities
- See exactly which events were triggered by your Drip Campaign
- Track execution status across all steps
- Review delivery statuses, recipients, timestamps, and any error codes
This section is essential for monitoring campaign performance, diagnosing issues, and confirming that everything is running as expected.
✅ Benefits of Pipedrive Automation with HelloSend
Automated Messaging
Send SMS | WhatsApp | RCS | Twilio WhatsApp messages automatically when deals move through pipeline stages or reach specific criteria. This reduces human follow-up and ensures your customers receive timely updates and reminders without delay.
Drip Campaign Automation
Effortlessly streamline your multi-step messaging workflow with HelloSend’s Drip Campaign feature. This guide will help you create, schedule, and manage drip campaigns—fully integrated with your CRM for seamless automation.
CRM Integration
Seamlessly connects with Pipedrive to read, update, and act on CRM data. This tight integration enables event-triggered campaigns and ensures messages are contextually relevant to each contact or deal.
No Manual Intervention
Once set up, your messages are automatically sent without the need for agents to initiate or follow up. It keeps communication flowing and ensures consistency at every touchpoint.
Multi-Number Support
Choose from multiple sender numbers for different workflows or regions. This allows your business to personalize communication and maintain sender familiarity across segments.
Template-Based Messaging
Use pre-approved templates for SMS | WhatsApp | RCS | Twilio WhatsApp to ensure your messages follow compliance rules and maintain a consistent tone and format across campaigns.
📌 Conclusion
By integrating HelloSend with Pipedrive's automation tools, you can create efficient, timely, and personalized messaging workflows. Whether you're sending updates, reminders, or follow-ups, HelloSend ensures every message is delivered to the right person at the right time—automatically.
Let me know if you want a version specifically tailored for SMS | WhatsApp | RCS | Twilio WhatsApp, or campaign-based triggers too.